I wanted to streamline the configuration of some of my settings in my Microsoft Entra ID tenant like administrative units, conditional access policies, authentication strengths or applications and service principals. Already using Terraform to deploy an Azure Landing Zone as Infrastructure as Code, so the obvious choice for me was to use same open-source tool by HashiCorp and fortunately there is a suitable provider for Entra ID available, although not always feature complete when it comes to the latest innovations.
This is not a tutorial for learning Terraform or Git, as I am still discovering new tricks with these tools myself. However, I am proud if I can help anyone facing the same challenges I initially encountered.
Prepare your working environment
First of all we need a git repository to host our Terraform code and running our pipeline. My decision fell on GitHub as version control repository hosting service, but GitLab, Azure DevOps or Bitbucket are probably suitable too. This tutorial highlights only GitHub though.
On the client side we need to install terraform, visual studio code with the Terraform extension by HashiCorp, git for windows and the Windows Terminal with PowerShell 7 and Azure CLI for better usability.
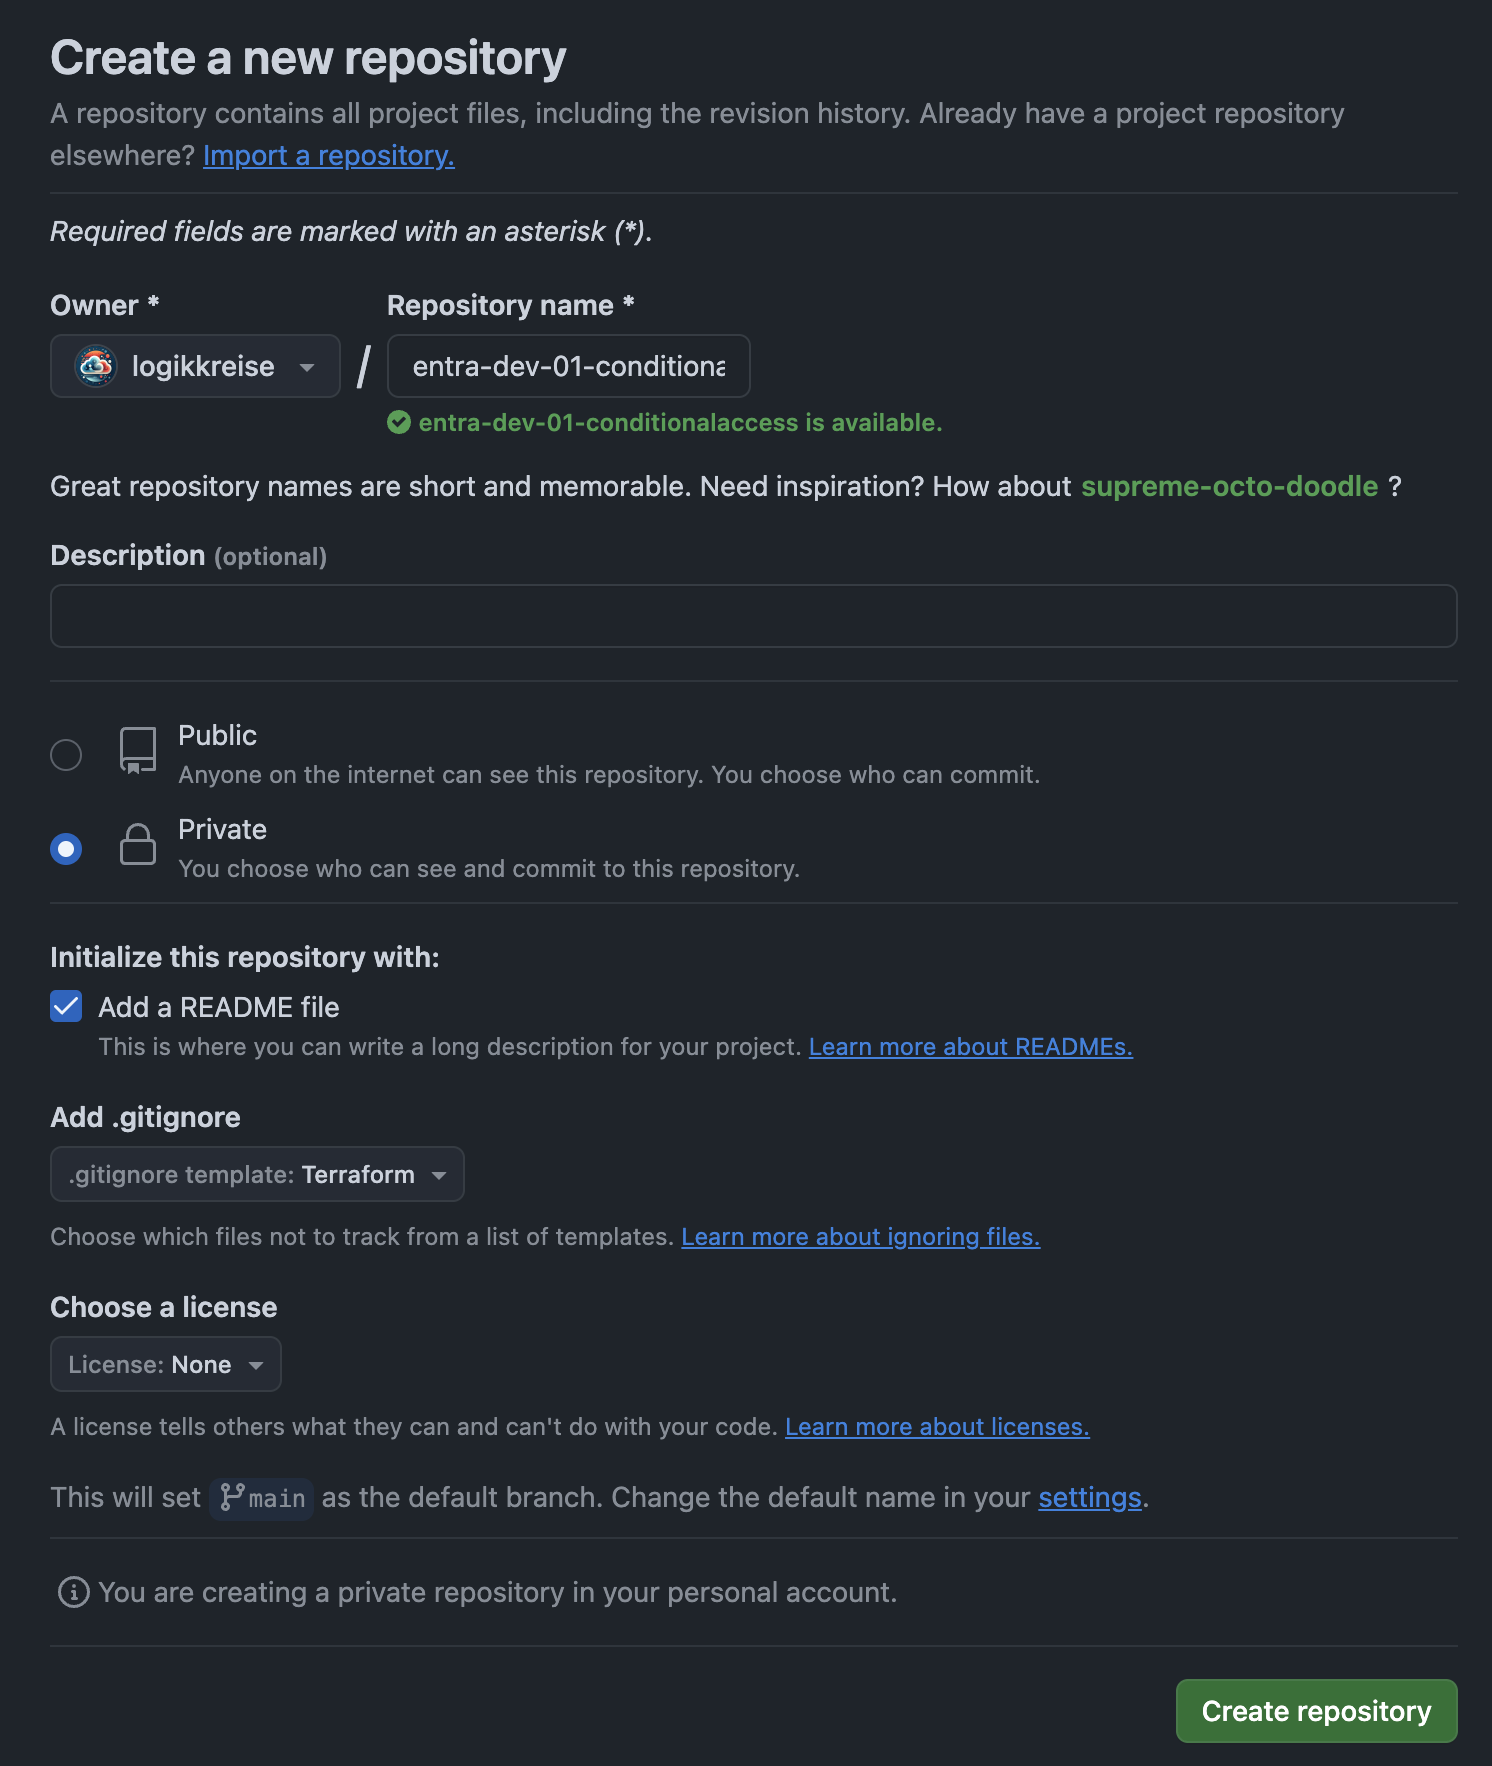
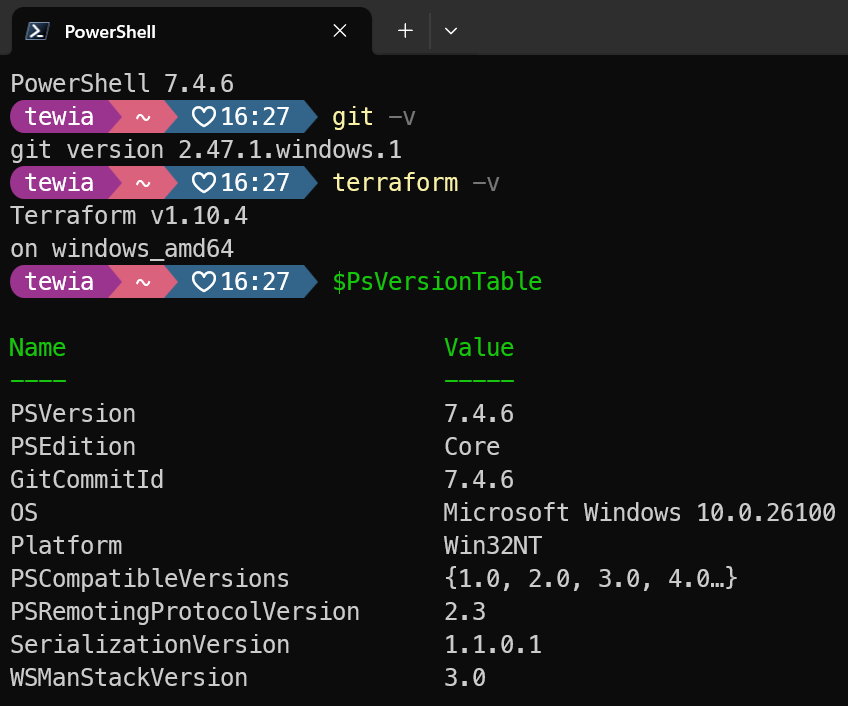
Add your SSH public key to your GitHub account and clone your newly created repository to your computer using visual studio code. Create the following blank files within your repository …
- provider.tf
- conditionalaccesspolicies.tf
…and also add these lines to your .gitignore file:
# Local .terraform directories
**/.terraform/*

# .tfstate files
*.tfstate
*.tfstate.*

# Crash log files
crash.log
crash.*.log

# Exclude all .tfvars files, which are likely to contain sensitive data, such as
# password, private keys, and other secrets. These should not be part of version
# control as they are data points which are potentially sensitive and subject
# to change depending on the environment.
*.tfvars
*.tfvars.json

# Ignore override files as they are usually used to override resources locally and so
# are not checked in
override.tf
override.tf.json
*_override.tf
*_override.tf.json

# Ignore transient lock info files created by terraform apply
.terraform.tfstate.lock.info

# Include override files you do wish to add to version control using negated pattern
# !example_override.tf

# Include tfplan files to ignore the plan output of command: terraform plan -out=tfplan
# example: *tfplan*

# Ignore CLI configuration files
.terraformrc
terraform.rc
Connect to your tenant
To connect to your Entra ID tenant we need to authenticate somehow. Our first steps will use the Azure CLI in our terminal and later migrate to a service principal with least privilege using OIDC used by our pipeline. Start the terminal in Visual Studio Code and type in the following:
# OPTIONAL
# Disabling the usage of the web account manager (WAM) under windows
az config set core.enable_broker_on_windows=false

# MANDATORY
# Login to Azure without a subscription needed / selected
az login --allow-no-subscriptions
A browser will startup and you have to authenticate to your Entra ID tenant using your tenant admin account for later use. Insert the following code in your provider.tf file and save it.
terraform {
  required_providers {
    azuread = {
      source = "hashicorp/azuread"
      version = "3.0.2"
    }
  }
}

provider "azuread" {
  # Configuration options
}
In summary, this Terraform configuration sets up the Entra ID provider (still named azuread), specifying the source and version, and provides a place to include any configuration options needed for your Entra ID resources. The provider block will be useful later for our service principal authentication.
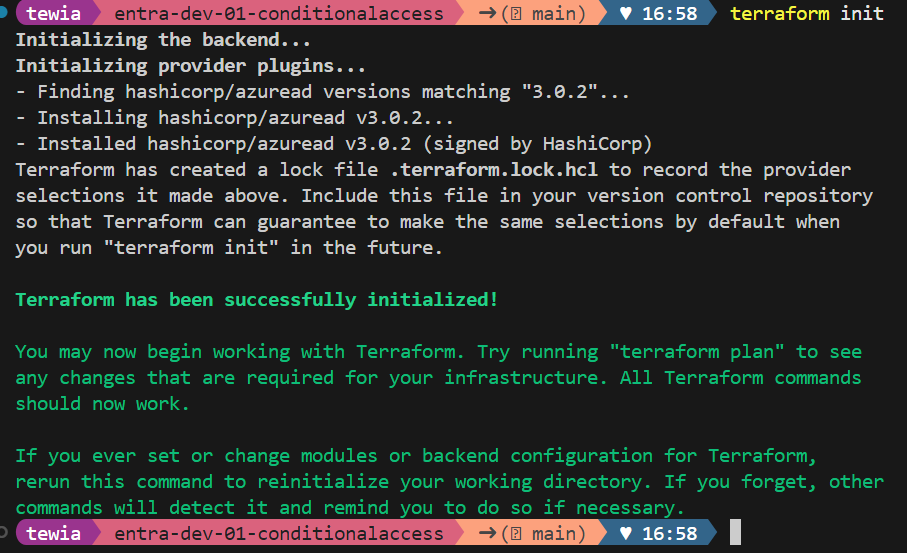
Navigate in your terminal in visual studio code to the folder of your repository and type terraform init and hit enter. With that we initialize the terraform environment and it will download the needed provider plugin we just configured we want to use.
Creating our first Infrastructure as Code
Now we try to create a very simple and disabled conditional access policy to see if everything is setup correctly. Copy and paste the following terraform code. You can fix the formatting using terraform fmt and terraform validate. Save the file.
resource "azuread_conditional_access_policy" "CA01" {
  display_name = "Require multifactor authentication for everyone"
  state        = "disabled"

  conditions {
    client_app_types = ["all"]

    applications {
      included_applications = ["All"]
    }

    users {
      included_users = ["All"]
    }
  }

  grant_controls {
    built_in_controls = ["mfa"]
    operator          = "OR"
  }
}
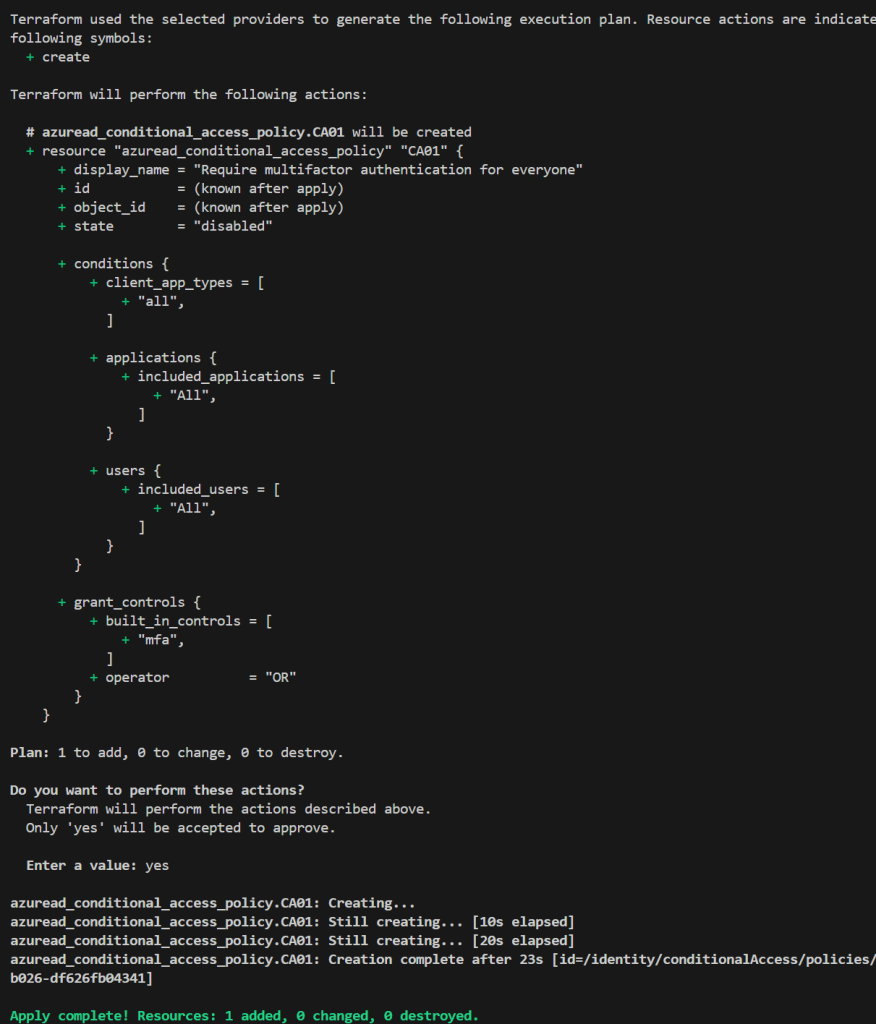
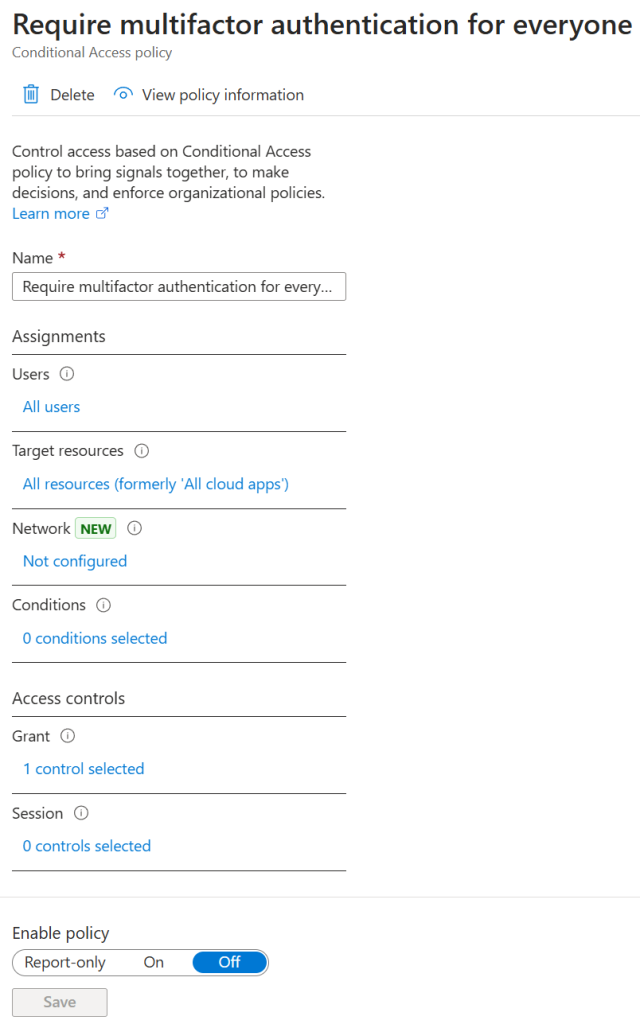
You can now run terraform plan to dry-run your configuration. In my case the output is the following and would create one new resource. You can then run terraform apply and confirm the plan with yes to create the disabled conditional access policy. After the completed apply the new policy will be visible in the Entra ID portal and we successfully created our very first resource using Infrastructure as Code.
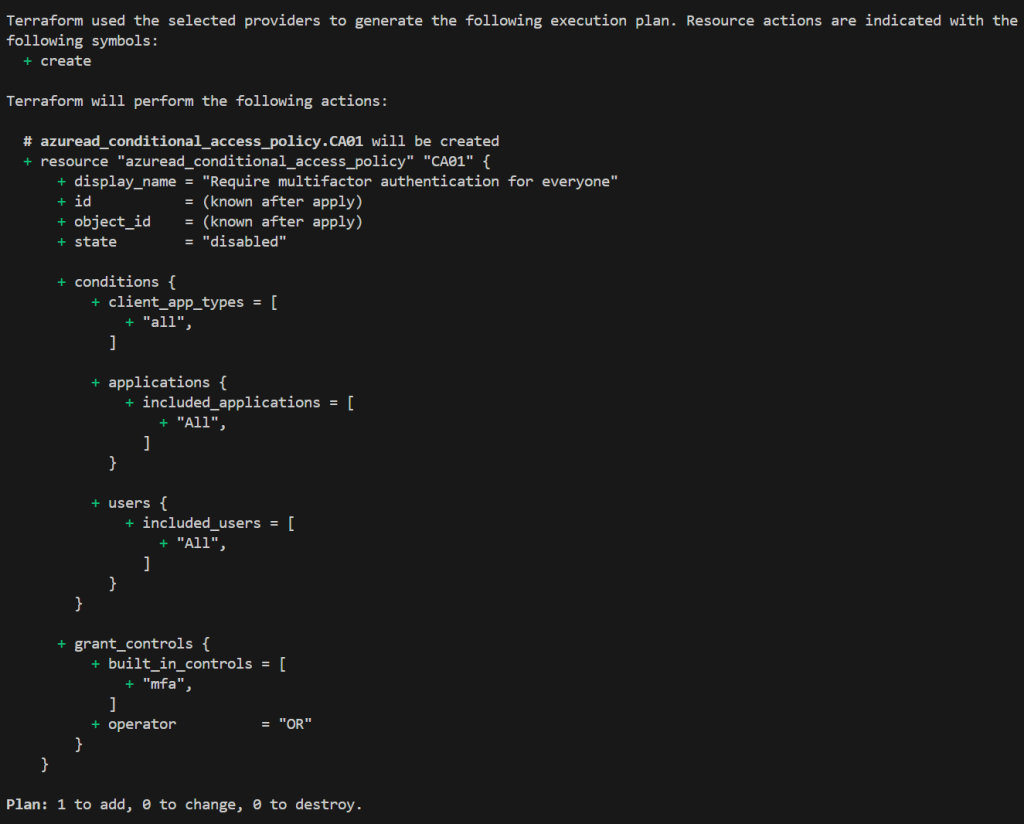
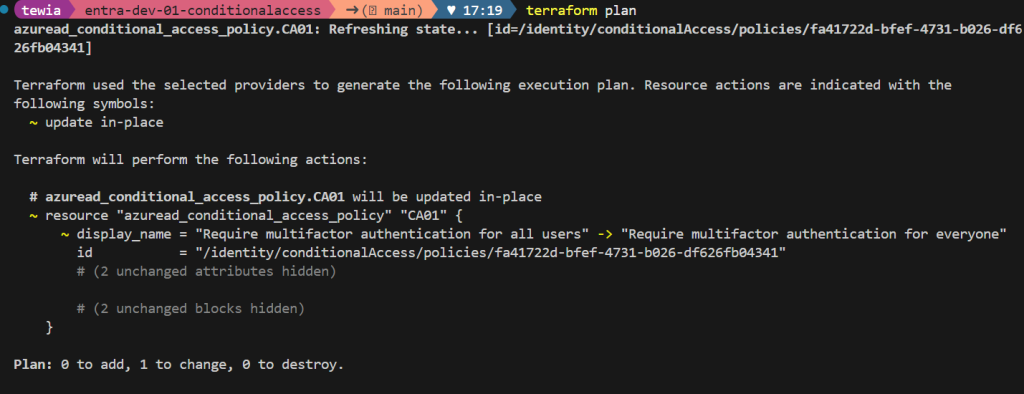
Maybe you noticed that while executing your terraform code a file named terraform.tfstate was created. That file is crucial to your infrastructure and contains your actual state what terraform thinks is correct. So if you know change anything via GUI in the Entra ID portal to your IaC managed Conditional Access Policy you just created and you run terraform without altering your code, it wants to redo these changes. I will give you a sample:
I changed the name of the conditional access policy from “Require multifactor authentication for everyone” to “Require multifactor authentication for all users” and ran terraform plan again:
Where to place the terraform statefile?
I guess you already found out for yourself, that keeping the statefile at your local drive or in your git repository isn’t a viable option. So we need a place where we can put our statefile and remain access to it. Additional we want to grant something like the GitHub pipeline access.
In my case I decided to create a container inside a blob storage within a dedicated resource group in my personal Azure tenant using the Azure CLI. The storage for the statefile is a typical “chicken or egg” dilemma. You cannot create and manage the storage for your statefile with the same Infrastructure as Code environment you are building with it. I mean you could but a single failure could vanish your statefile and your config and maybe your whole infrastructure is gone too.
Our next steps involve creating a service principal in Entra ID and connecting it to our GitHub repository via OIDC workload Identity. We will then grant it permissions to our azure blob storage container so our GitHub pipeline (called GitHub Actions Workflow) will perform the terraform tasks instead of ourself.
Creating the service principal and setting up the federation credentials
To create a simple service principal its sufficient to create a new app registration in Entra ID. I called mine just Terraform Code, left the platform configurations and URIs empty. To build our Conditional Access Policies we need at least the Graph API applications permissions Policy.ReadWrite.ConditionalAccess and Policy.Read.All. Don’t forget to grant admin consent for your tenant and dont forget to write down your tenant id and client id from your app registration. We will need it later.

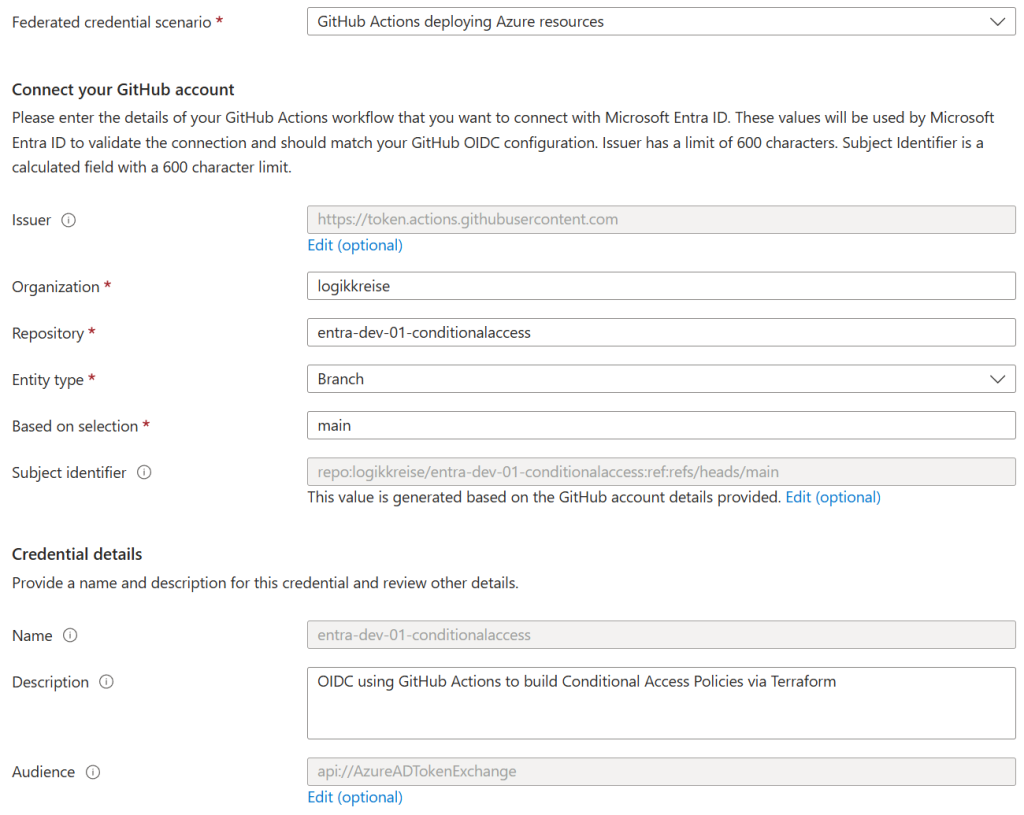
Next we switch to federated credentials under certificates & secrets and click on add credential. We choose “GitHub Actions deploying Azure resources” and now have to fill some required details for our workload identity. You can copy mines besides the value for organization and maybe repository.
| Name | Value |
|---|---|
| Issuer | https://token.actions.githubusercontent.com |
| Organization | That is your GitHub username |
| Repository | That is your created GitHub repository |
| Entity type | Branch |
| Based on selection | This is your branch name, likely main |
| Name & Description | Up to you to give that Entry a name and a useful description |
| Audience | api://AzureADTokenExchange |
Creating the azure blob storage
Now we want to create our new home for our statefile. You can create the blob storage and the container via Azure portal or with help of the Azure CLI.
# create Azure resource group
az group create --name rg-terraform-prd --location germanywestcentral

# create Azure storage account
az storage account create --name stterraformstatefileprd --location germanywestcentral --resource-group rg-terraform-prd --kind StorageV2 --access-tier Hot --public-network-access Enabled --sku Standard_LRS

# create Container in Azure storage account
az storage container create --account-name stterraformstatefileprd --name terraform-prd --auth-mode login
After we created the container we will now grant the “Storage Blob Data Contributor” role to our created service principal. We can simply do this within the Azure portal and search for the name of it or paste the object id of the enterprise application.

Preparing the GitHub repository
Open your repository and navigate to Settings -> Secrets & Variables -> Actions. We will now create some Secrets and Variables for our GitHub Actions workflow. Secrets are encrypted variables used to store sensitive data, like API keys or passwords, securely in GitHub Actions Workflows. They keep your sensitive information safe and hidden from your code. Variables are instead used to store values that you can be reused throughout the workflow.
| Name | Value | Secret or Variable |
|---|---|---|
| AZURE_SUBSCRIPTION_ID | Your Azure Subscription ID | Secret |
| ENTRA_ID_CLIENT_ID | The client id you did write down | Secret |
| ENTRA_ID_TENANT_ID | The tenant id you did write down | Secret |
| AZURE_CONTAINER_NAME | The azure container name you just created | Variable |
| AZURE_KEY | Choose a name for your statefile | Variable |
| AZURE_RESOURCE_GROUP_NAME | The azure resource group name you just created | Variable |
| AZURE_STORAGE_ACCOUNT_NAME | The azure storage account name you just created | Variable |
Preparing the Terraform code to authenticate using OIDC
After we created the secrets and variables in our GitHub repository, we can now extend our Terraform code. To create the statefile into a blob storage located in azure we need to add another provider plugin named azurerm to our provider.tf file. Please replace your content with this and save your file.
terraform {
  required_providers {
    azuread = {
      source  = "hashicorp/azuread"
      version = "3.0.2"
    }
    azurerm = {
      source  = "hashicorp/azurerm"
      version = "4.15.0"
    }
  }

  backend "azurerm" {
  # Configuration options
  }
}

provider "azuread" {
# Configuration options
}

provider "azurerm" {
# Configuration options
}
Building the Workflow
Previous to that I had no experience with GitHub Actions Workflows and only knew about Bitbucket pipelines. All the better that I fell in love with the simple syntax and the many possibilities that GitHub Actions Workflows offer.
You can create a Workflow by navigating to Actions in your GitHub repository a choose “simple workflow” or just create the following structure in your repository via Visual Studio Code or via terminal:
New-Item -Path ".github\workflows\pipeline.yml" -ForceOpen the new pipeline.yml file in Visual Studio Code an paste the following content:
name: Terraform pipeline

on: [push]

jobs:
  terraform:
    runs-on: ubuntu-latest
    permissions:
      id-token: write
      contents: read

    steps:
      - name: Checkout code
        id: checkout
        uses: actions/checkout@v4

      - name: Setup Terraform
        id: setuptf
        uses: hashicorp/setup-terraform@v3
        with:
          terraform_version: 1.10.4

      - name: Terraform init
        id: init
        env:
          ARM_CLIENT_ID: ${{ secrets.ENTRA_ID_CLIENT_ID }}
          ARM_TENANT_ID: ${{ secrets.ENTRA_ID_TENANT_ID }}
          ARM_SUBSCRIPTION_ID: ${{ secrets.AZURE_SUBSCRIPTION_ID }}
          azure_resource_group_name: ${{ vars.azure_resource_group_name }}
          azure_storage_account_name: ${{ vars.azure_storage_account_name }}
          azure_container_name: ${{ vars.azure_container_name }}
          azure_key: ${{ vars.azure_key }}
          ARM_USE_OIDC: true
          ARM_USE_AZUREAD: true
        run: terraform init -backend-config="resource_group_name=$azure_resource_group_name" -backend-config="storage_account_name=$azure_storage_account_name" -backend-config="container_name=$azure_container_name" -backend-config="key=$azure_key"

      - name: Terraform Plan
        id: plan
        env:
          ARM_CLIENT_ID: ${{ secrets.ENTRA_ID_CLIENT_ID }}
          ARM_TENANT_ID: ${{ secrets.ENTRA_ID_TENANT_ID }}
          ARM_SUBSCRIPTION_ID: ${{ secrets.AZURE_SUBSCRIPTION_ID }}
          ARM_USE_OIDC: true
          ARM_USE_AZUREAD: true
        run: terraform plan -out plan.out

      - name: Terraform Apply
        id: apply
        env:
          ARM_CLIENT_ID: ${{ secrets.ENTRA_ID_CLIENT_ID }}
          ARM_TENANT_ID: ${{ secrets.ENTRA_ID_TENANT_ID }}
          ARM_SUBSCRIPTION_ID: ${{ secrets.AZURE_SUBSCRIPTION_ID }}
          ARM_USE_OIDC: true
          ARM_USE_AZUREAD: true
        run: terraform apply -auto-approve plan.out
Obviously that Workflow is a very simple version and not recommended for a production environment, but it will last for our small lab here. Perhaps you have already noticed them: Our Secrets and Variables we created earlier are inside the yml file. I will try to explain the Workflow so you will unterstand the content and are motivated to expand it by yourself in the near future. I can highly recommend to take a look at docs.github.com.
The GitHub Action Workflow is triggered whenever changes are pushed to the repository and will run the job named terraform. The workflow is configured with specific permissions, allowing write access to id-token and read access to the content of the repository. If the content permissions are missing, the workflow will not be able to read the repository and execute the job.
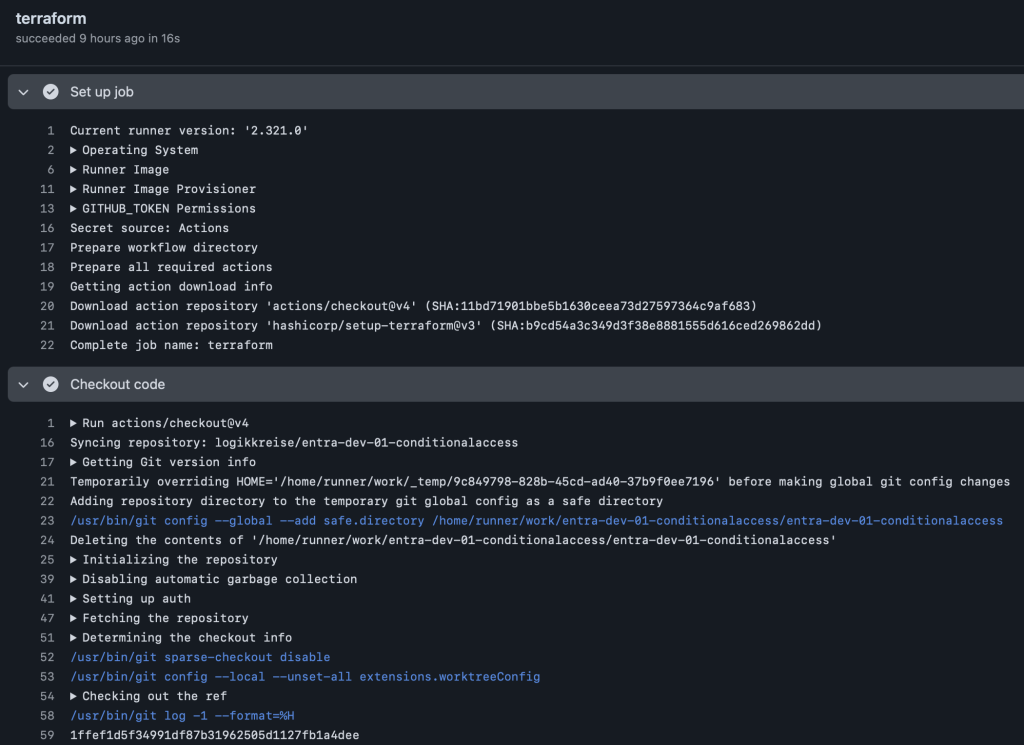
The workflow consists of several steps. First, it “downloads” the code from the repository using the checkout action. Next, it sets up Terraform with the latest version at the time of writing using the hashicorp/setup-terraform action. Following the setup, it initializes Terraform with the necessary backend configurations for using the azure blob storage and our login via oidc using Entra ID to access the statefile.
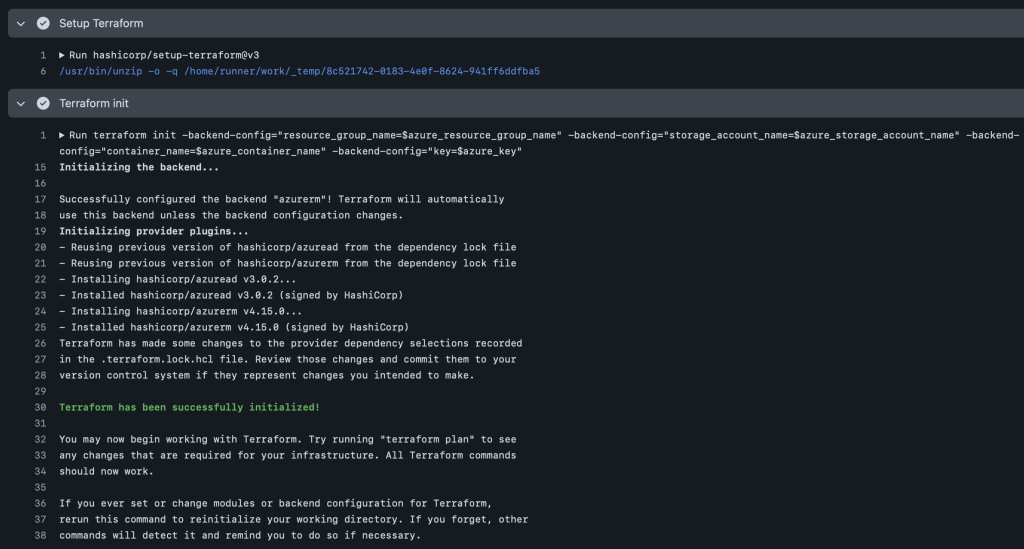
This initialization step makes use of our secrets and variables from the GitHub repository. These so called environment secrets and variables are then stored into local variables. Terraform itself uses some default variables we can use to transfer these directly to terraform without additional configuration.
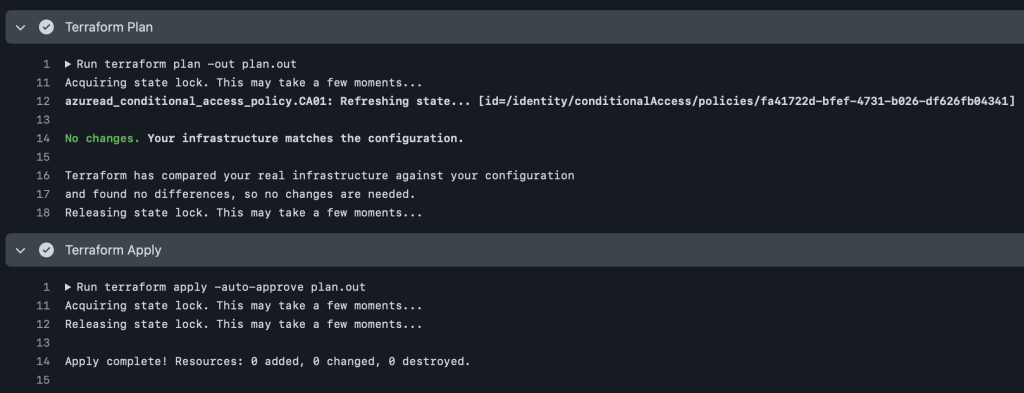
After initialization, the workflow runs terraform plan to create a preview of the infrastructure changes and saves this plan to a file called plan.out. Finally, the workflow applies the saved plan to implement the changes to the infrastructure by running terraform apply with the auto-approve option.
At last we can push our files to our GitHub repository. The following files should be included in the push. After the push the GitHub Actions Workflow will start and deploy the terraform configuration to your tenant. If you just want to try terraform plan you could remove the lines 47-55 in the pipeline.yml file.
A few seconds after the push to the repository the Workflow will start and can be viewed within the Actions tab in your repository.

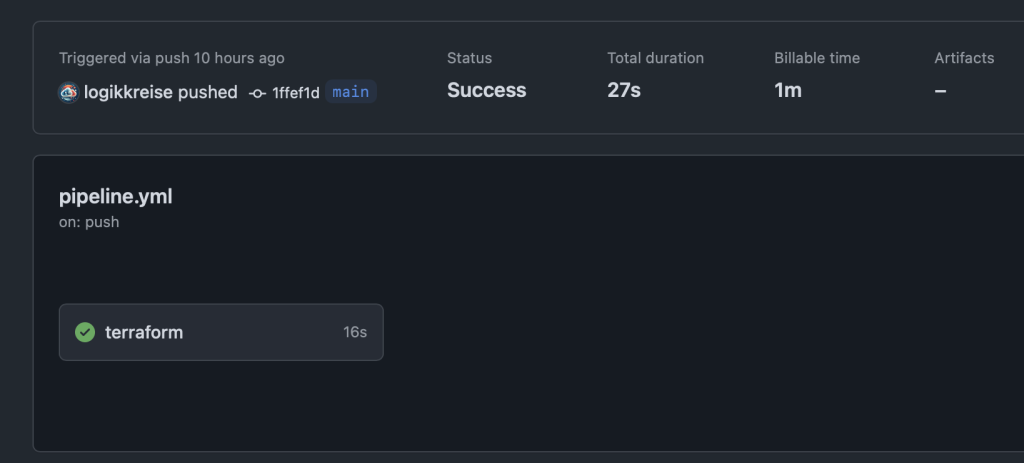
And that’s it. I hope I was able to help you a little with this article and possibly show you something new. Next step would be to create a conditional access policy for our service principal and only allow connections from ip addresses used by GitHub Actions.
